Sony Photos & Videos Recovery
How to Recover Photos, Videos from Sony Xperia
As we know, women love pretty and beauty even in electronic products. Good shape of phone and cover attract their eyes. Take Sony Xperia for an example, female users tend to use it because of its cool look. Most of time, they take photos no matter when and where, record video and perhaps watch movie on phone. So it’s a nightmare if they lost Android data and didn’t make a backup in computer.
Consider your thoughts, we are trying to look for powerful and useful software - Android Photo Recovery which supports Android phone like Sony, SamSung, HTC, LG, Mototola, etc. It can retrieve any data such as photos, SMS, call history, calendar, notes, music, contacts and more. With simple few steps, you can recover your lost photos from your phone. Next, we are gonna show you how magical program work.
Tutorial: How to Recover Sony Xperia Photos and Videos
Step 1: preparation: download and connect
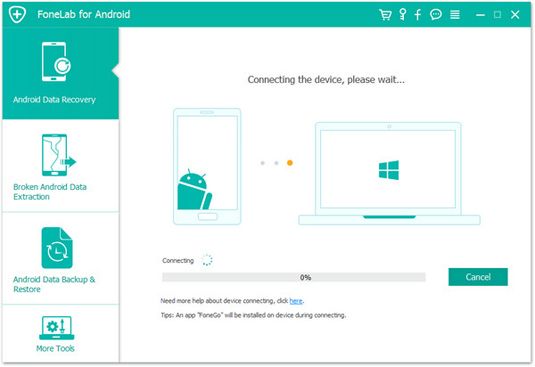
Well, as usual, download and launch recovery program. In the meanwhile, connect Sony Xperia computer via USB cable. During recovery process, you need to make sure the connection between phone and computer as good as possible.

Step 2: detect your Sony
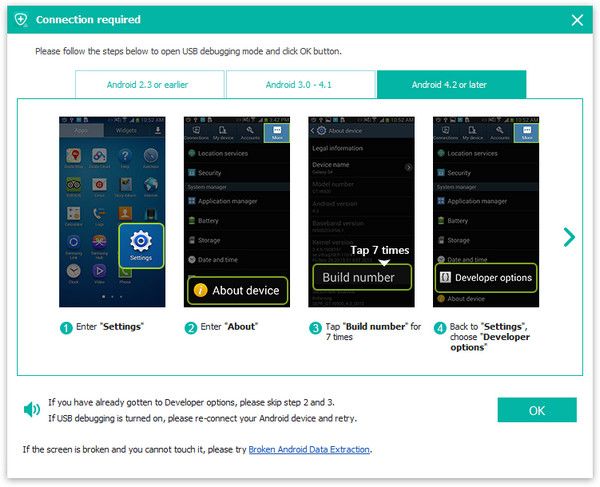
After that, computer will ask if you didn’t set USB debugging before. If you did, you can just skip this part. The program detect your Sony phone as long as it connected well.Here are some USB debugging choices:
1. For Android 2.3 or earlier: Enter "Settings < Applications < Development < USB debugging".
2. For Android 3.0 to 4.1: Enter "Settings < Developer option < USB debugging"
3. For Android 4.2 or newer: Enter "Settings < About Phone < Build number" for several times until you get a note saying that "You are under developer mode". Then, go back to "Settings < Developer options < USB debugging".

Step 3: check and select files
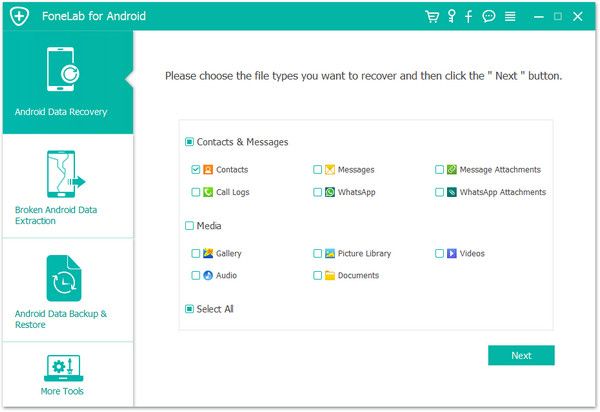
When it finished device detected, click "Next". Few seconds later, you can see few files in main window, choose files you want to recover. Next, choose scanning mode. You are allow to preview all of data or only read deleted files. Choose all the files you want to scan and click "Next".

Step 4: last move: preview and recover videos and photos
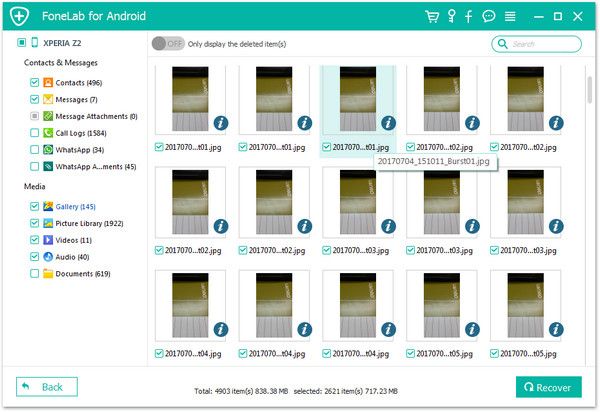
When you reach this part, it almost done. Here you can look up all pictures you had and check which one you need which it’s not. At last, everything is done. Click "Recover" to restore them and copy on your laptop.


