Transfer Data Between iOS Devices
How to Transfer Data Between iOS Devices on Mac
Apple's products consist of iPhone, iPad, iPod, etc. and they become more and more multifunctional in the future. The fashion style and high technology of Apple's product meet peoples’ taste, they all become Apple fans instantly. However, how to transfer data between these apple products on Mac? In this case, many users realize that iTunes can transfer data between iOS devices, but the data on iTunes cannot be read on the Mac, which will cause you a trouble while transferring. To be frank, you should look for a third tool to help you. iOS data transfer can be the best choice for you to transfer a amounts of data between iOS devices on Mac.
Two ways in Transferring Data Between iOS Devices on Mac
Tutorial 1: Transfer Data Between iOS Devices through iOS Data Transfer
iOS Transfer provide you with a convenient way to transfer Videos, Videos, Photos and more between Apple on Mac. It is compatible with all kinds of devices like iPhone X/8 (Plus)/7 (Plus)/6s (Plus)/6 (Plus)/5s/5c/5/SE/4s/4, iPad Pro, iPad mini, iPad Air, iPod touch and so forth. What’s more, via this program, you can also backup your data from iOS devices to Mac as well.
The Feature of iPhone Data Transfer Software:
1. Transfer contacts, music, photos, videos, text messages, playlists, iTunes U, Podcasts and more to Your PC or iTunes, or another smartphone easily, vice versa.2. Manage iPhone contacts: Import, export, remove duplicates & sync with Outlook.
3. Load your iDevice with music and video incompatible with iTunes.4. One-Click to transfer movies, TV Shows, music videos, video recordings from computer to iPhone instead of iTunes, no matter how large the video files are, 1GB, 2GB…or dozens of GB, you can add videos in minutes. It is compatible with a variety of video formats such as MP4, M4A, MOV, WMV, AVI, FLV.
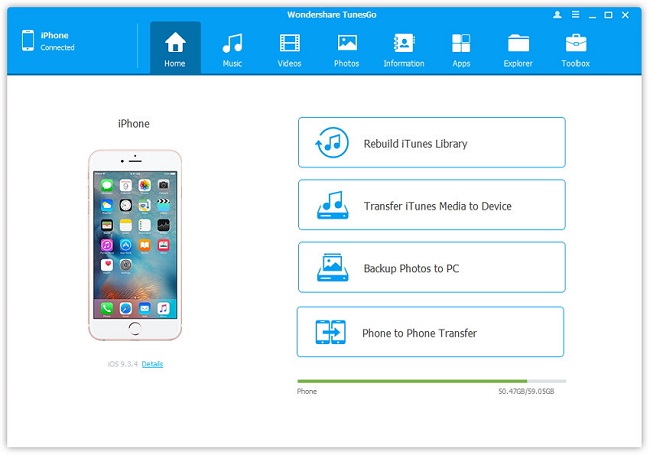
Step 1. Run the iOS Data Transfer program and connect your iOS devices to Mac.

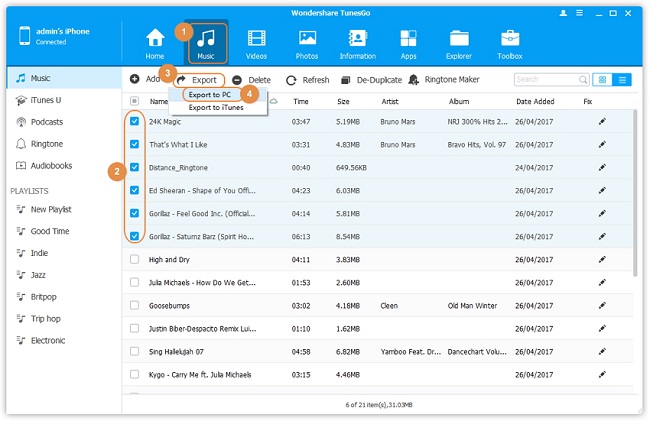
Step 2. The program will detect your devices atomically and the detected data on your devices will show up later. Choose what you want to transfer, click them in the left column. Take music as an example, click "Media" in the left column and click "Music" to turn to the music window. Finally, click the triangle under "Export to" to choose to transfer music to your iDevice.

Tutorial 2: Transfer Data Between iOS Devices through Phone Transfer
Phone Transfer will be the other good way to transfer data between iOS devices. It can transfer the content include contacts, photos, music and more from one iOS devices to another one , such as iPhone to iPhone, iPad to iPhone, iPod to iPhone, etc.The Feature of Mobile Transfer Software:
1. Simple yet effective solution for transferring content between Symbian, Android, and iPhone.2. Not just contacts, transfer SMS, call logs, contacts, photos, music, videos and apps.
3. Comprehensive contact copy, including job title, email addresses, company name, etc.4. Works with over 2,000 phones including Droid, Symbian (Nokia), and all models of iPhone, including new iPhone X.
5. Transfers content between phones on different networks. AT&T, Verizon, Sprint, T-Mobile - no problem!6.Zero quality loss & risk-free: everything you transfer is 100% same as the original and can be only read by yourself.
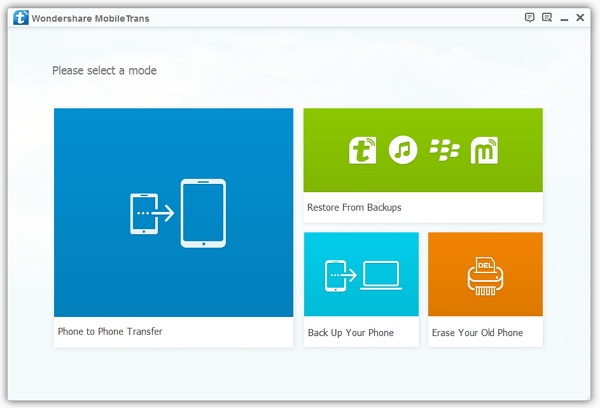
Step 1: Firstly, run the Phone Transfer after installing it on your Mac, then connect both of your iOS devices to Mac.

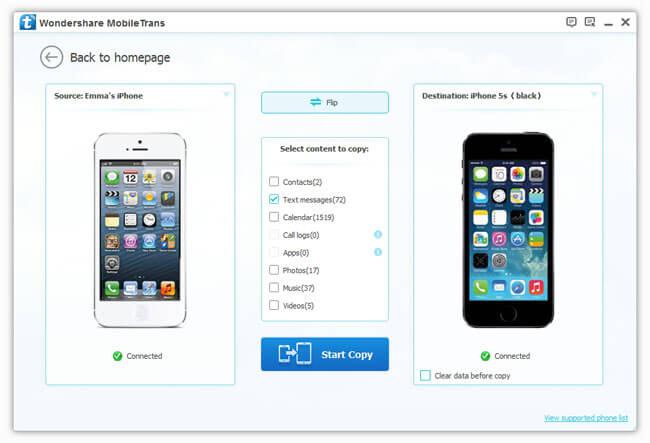
Step 2: The program will sync and detect your devices at once, the data on your devices the data found and shown on the interface. Then you can choose the data you want, and click "Start Copy" to continue the transferring.

- Phone to Phone Transfer
- Transfer iPhone Music to iPad
- Transfer Android Files to Mobile
- Transfer iPhone Files to Android
- Android Data to Android
- Transfer iPhone Files to iPad
- Transfer iPad Music to iPhone
- iPhone Contacts to Android
- Transfer iPhone Photos to iPad
- Android Contacts to iPhone
- iPhone Music to Android
- Android Contacts to Android


