Restore Android Documents
How to Restore Deleted Documents from Android Phones
Store some documents in your Android phone, so you can view and share them at any time. For some reason, you may lose some important documents on Android, so how to recover them directly from Android? Sometimes if you don't back up the data in time, you still have a way to scan and recover them from Android phone directly with the help of third-party data recovery tool.
Android Data Recovery is the most recommended software for you recover deleted or lost data. It can help you retrieved deleted data from your Android's internal memory card and external SD card. Android Data Recovery allows you preview the find out data before recovery. You are able to choose the data which you want to restore. The program supports almost all brands of Android phones, such as Samsung, Huawei, HTC, Lenovo, Oneplus, and many others. When you have a problem of recovering lost data from Android, it should be your best choice.
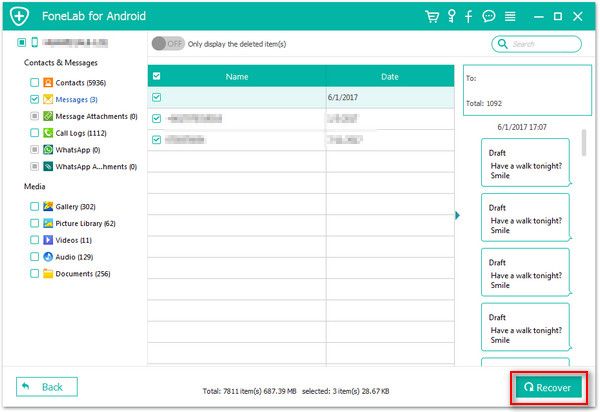
Not only recover documents, but also other data like pictures, videos, text messages, audios, and more. Install the free trial version on the computer and follow the detailed steps to restore deleted documents from Android with ease.


How to Undelete Documents from Android Phone
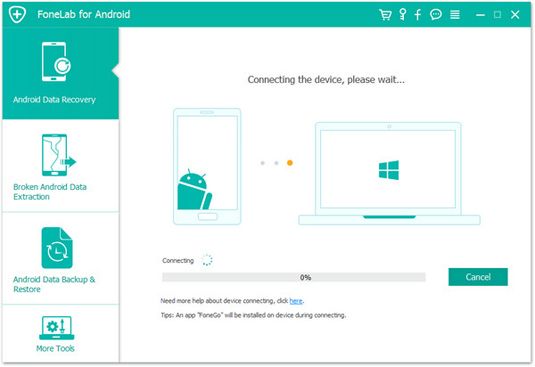
Step 1. Connect Android phone to scan
Run the Android Data Recovery program on your computer, several options will be showed for you to choose in the main windows, you can tap "Android Data Recovery" section. After that, connect your Android phone to the same computer with a usb cable.
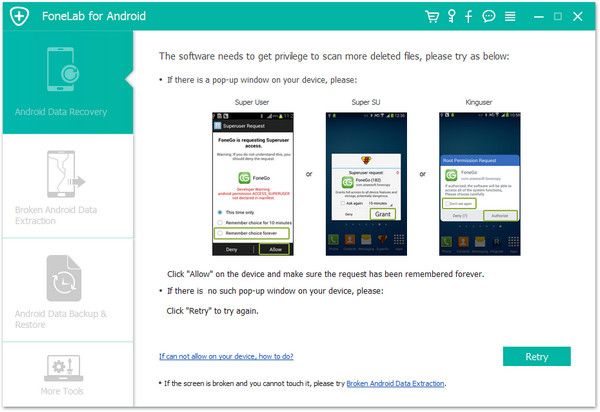
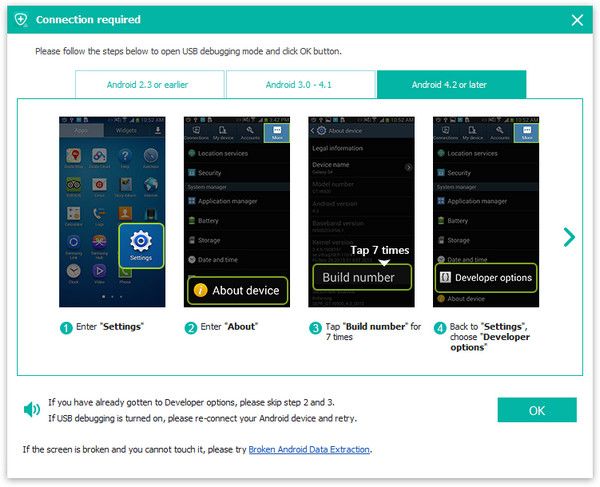
Step 2. Turn on USB debugging
If you don't turn on usb debugging, you will see the windows to require you to open it, follow the steps.
1. For Android 2.3 or earlier: Enter "Settings" < Click "Applications" < Click"Development" < Check "USB debugging".
2. For Android 3.0 to 4.1: Enter "Settings" < Click "Developer options" < Check "USB debugging".
3. For Android 4.2 or newer: Enter "Settings" < Click "About Phone" < Tap "Build number" for several times until getting a note "You are under developer mode" < Back to "Settings" < Click "Developer options" < Check "USB debugging".
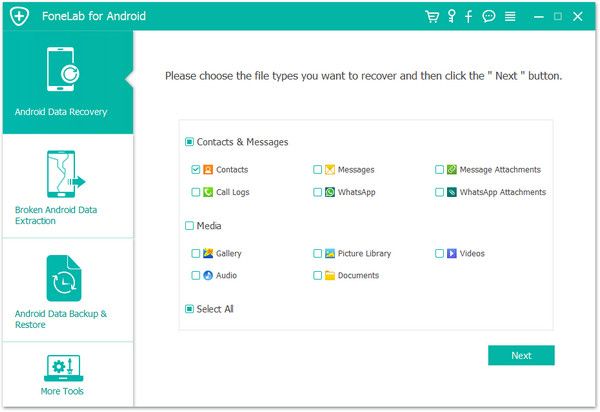
Step 3. Choose data type to scan
In the new interface, all data type will display after you enter USB debuggin, you can see photo, video, contacts, contacts, sms and more. We tick "Documents" and tap "Next" to start scan your phone.