Clear History on iPhone
How to Clear History on iPhone
When iPhone users switch from an old iPhone to a new one, they may remember to move their SMS, contacts, photos to the new phone. Since data like call history and other data are of no use, they will ignore them. Actually, these data contain lots of private information. And clearing them up when you abandon your old iPhone is quite necessary. If you happen to stuck in this trouble, iPhone Data Eraser will be your savior at the moment.
When you have iPhone Data Eraser in hand, iPhone history including call history, contacts, photos, messages all can be thoroughly deleted in minutes and there is no going back. It is a fantastic software which can prevent you from information disclosure. It has a compatibility with iPhone 5s/5c/5/4s/4, all iPad and iPod touch 5/4.If you are interested in it, the trial version of iPhone Data Eraser is provided for you. You can refer to the instructions underneath and experience it by yourself.


Guides: Clear iPhone History Permanently
Note: You are advised to make a backup of some important data on your iPhone, just in case. Because when you take up iPhone Data Eraser to execute the data erasure, your data will disappear once and for all.Step 1. Install iPhone Data Eraser and Link iPhone with your computer
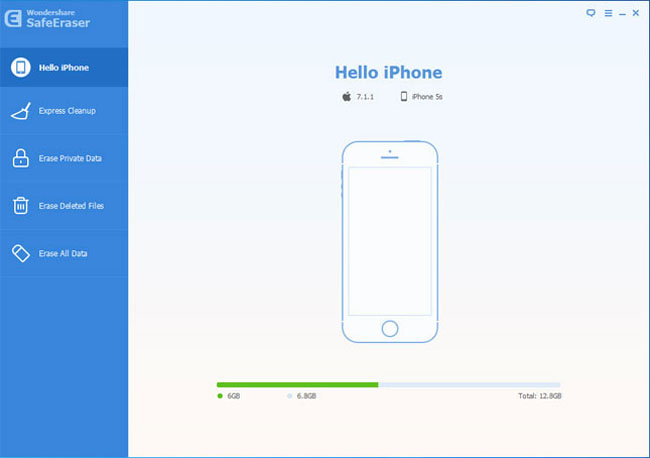
At the first place, you are required to complete the installation of iPhone Data Eraser and have it gotten to work. Next, a USB cable is needed to build the connection between your iPhone and computer. If you see the note "Failed to connect" show up on your iPhone, you should click the button "Trust" which is on your iPhone screen. By doing this, your iPhone and computer are ensured to be connected in a good condition. Then, you can find the information of your iPhone like name and iOS version shown on your computer.
Step 2. Start the private data Scanning
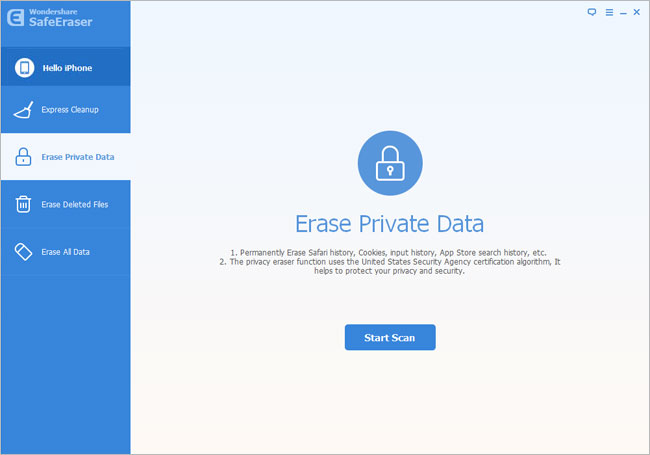
In this part, you are asked to tap on the button "Erase Private Data" which is located in the column on the left. You have a chance to preview the some specific data after you click the button "Start Scan".
Step 3. Check file details and choose history items
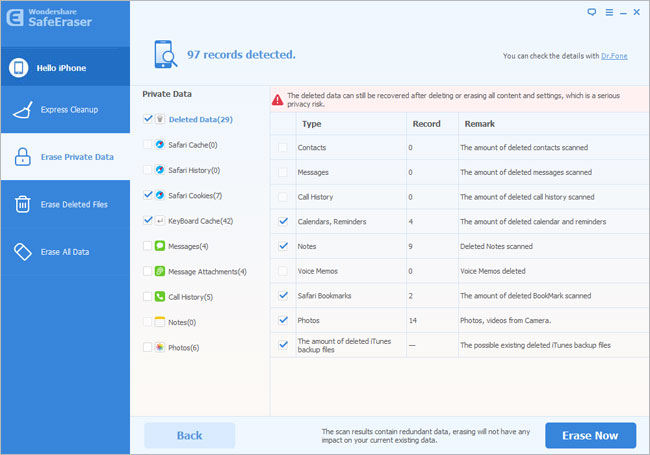
Several minutes past, a list of iPhone data including history, images, notes as well as SMS will be shown to you. Now, check the boxes which is in front of the "Safari History" and "Call history" when you are just in need of erasing history.
Step 4. Erase history data
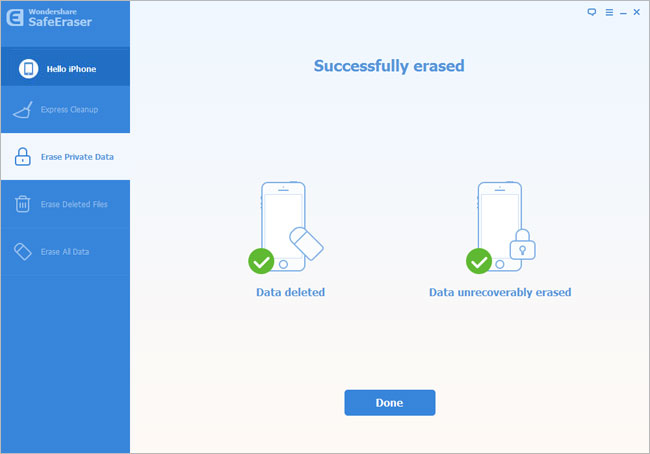
Once you tap on the button "Erase Now", those data you ticked will be deleted forever. When this operation is finished successfully, an interface like the sample picture underneath will pop up. When it is completed, you need to press "Done".
That’s all! In addition to erasing data in your iPhone, iPhone Data Eraser can help you delete junk files so as to make room for your iPhone. Here we promised that data you choose to erase will totally disappear. You can have a try with the free version of iPhone Data Eraser to confirm this point. You will find it convenient and efficient!
- Delete iPhone Data Before Selling
- Delete Contacts on iPhone
- Delete Photos from iPhone
- Delete Messages on iPhone
- Delete Apps on iPhone
- Delete Songs from iPhone
- Erase iPad Data Before Selling
- Delete Data on iPad
- Delete Emails on iPhone
- Eraser All Contents and Settings on an iPhone
- Erase Data on iPod touch